
1)- ansamblul este mult mai solid !
2)- constructia permite imbinarea dintre doua,trei sau patru culori!
Mai mult chiar, executia mi se pare mai usoara in acest caz de constructie .Precizez ca si in acest caz, nu este o piesa tocmai usor de realizat(exceptand persoanele care au ceva experienta),si ma refer aici in special la partea de asamblare.
This is my attempt for to find the modular way of the famous 3D masu box created by Dave Brill.I spent many hours for to find the better way of construction.This modular version has two advantages:
1)-the ansamble is more stronger(no glue)
2)- you can join two or four colours through modular connection.
More, in my opinion the execution is easer.The difficult part as in David model using one sheet,is the paper collapses...
Formatul hartiei rectangulare trebuie sa fie de 1:9/5,adica la o latime a foii de 15 cm spre exemplu,lungimea foii este de 9x15/5 adica de 27cm.(modelul foto este la aceasta scara)
Calculul matematic realizat, are in vedere relatia dintre grosimea si latimea cutiei de 1/5.Asadar latimea cutiei obtinute este de 5 ori grosimea acesteia.Este relatia cea mai expresiva din punctul meu de vedere si am realizat ca atare calculele necesare pentru un asemenea rezultat.La marimea foii de 15 cu 27 cm,rezulta o latime de 15:2= 7,5 cm si deci o grosime de7,5:5=1,5cm.
Format paper:rectangle 1:9/5cm
Example:l=15cm, than L=15x9/5=27cm


Instructiuni/Instructions:
linie neagra/black line-pliere in "vale"/valley line
linie rosie/red line-pliere in "munte"/mountain line
A)-Pliere modul/Fold the modul
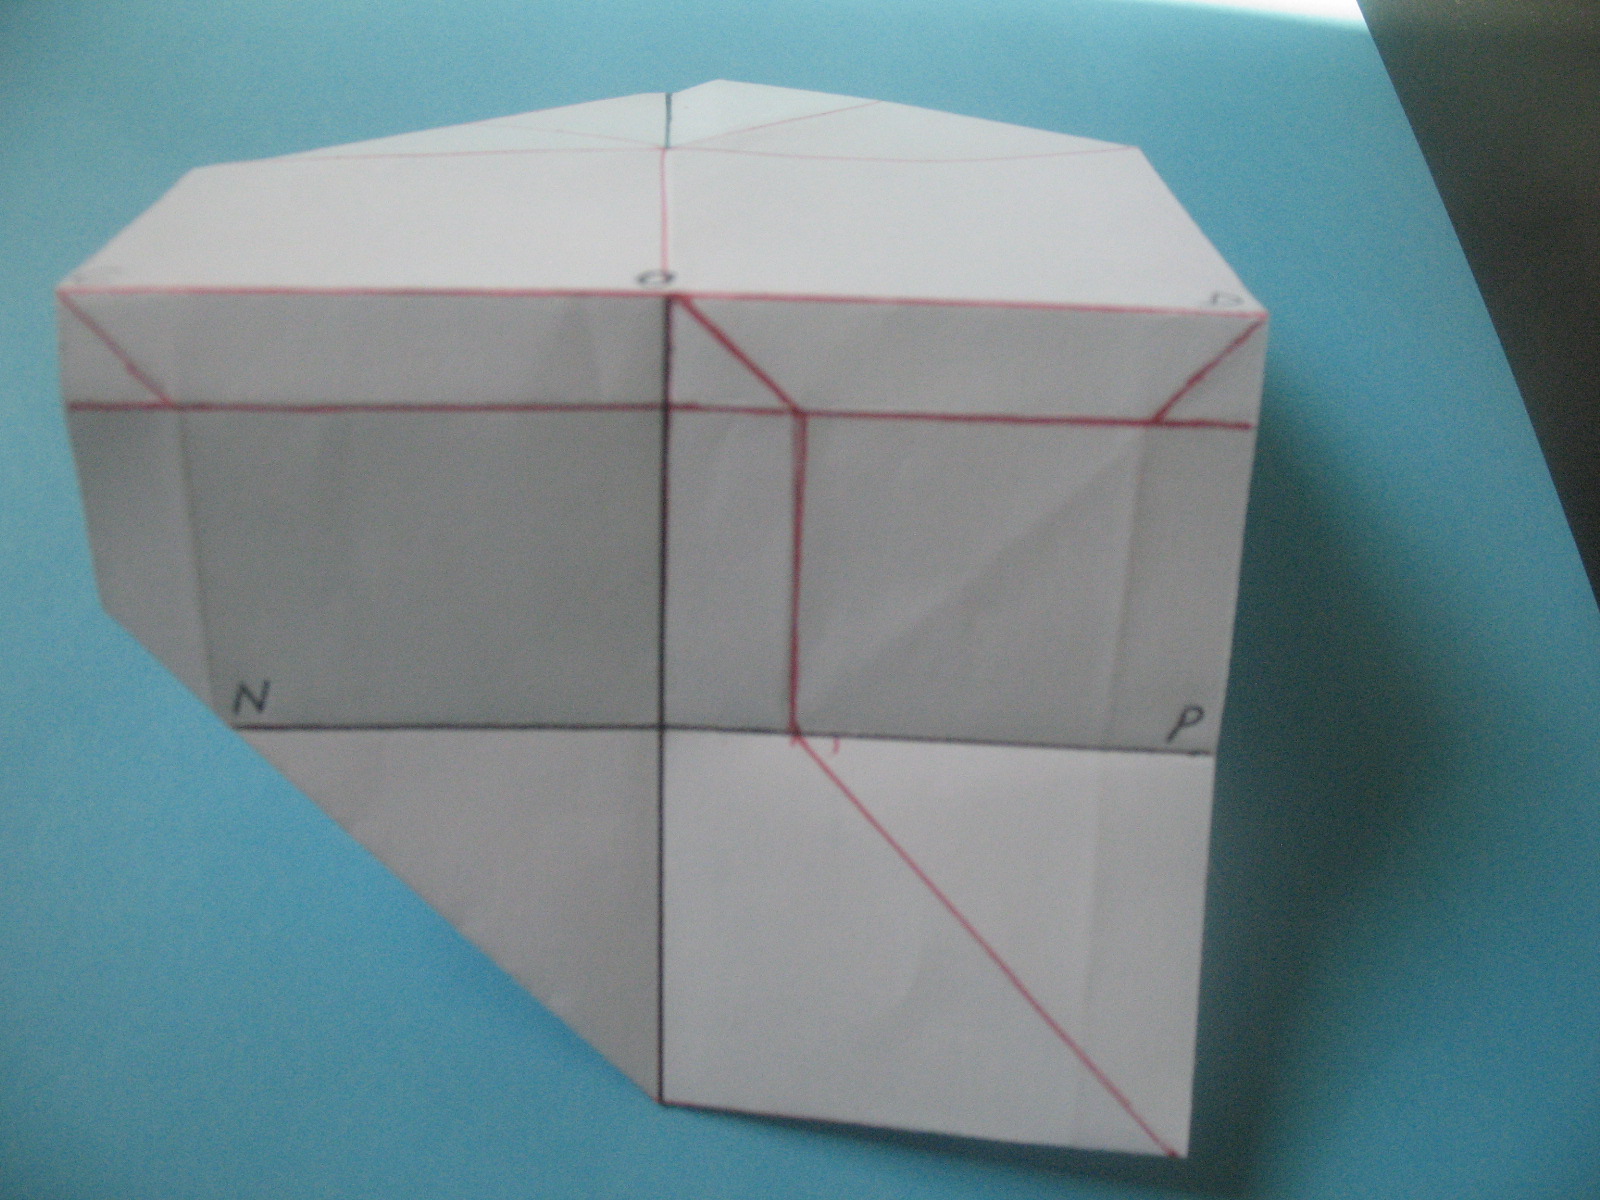
1)-Plieaza conform liniaturii din imagine/Make the next crease pattern:
AO=OB,CO=OD,O1O= BO1

The superior lateral over the points O2O3,result GH and the thickness OO4


Turn back the paper and transform the mountain line O1B, in a valley line.


-Fold as in the photos for to obtain the plane of the bottom of the box.


-Open the papaer and put it in this position :

6)- Plieaza urmatoarele 3 diagonale scurte
-Fold the next 3 short diagonals


Acesta trebuie sa fie rezultatul:
This have to be the result:

7)-Plieaza urmatoarele doua linii paralele
-Fold the next two paralels:


8)- Plieaza colturile mici laterale si dupa ele linia inferioara
-Fold the small corners and over them fold the inferior line


9)-Linia obtinuta anterior se suprapune cu latura DC
-The anterior line resulted overlaps with DC line


10)-Plieaza o paralela din varful diagonalei mediane doar pana intalneste prima linie orizontala(vezi rezultatul in etapa 11)
- Fold a paralele from the top of the median diagonal only to intersection with first horizontal line(see the result in 11 step)

11)- Plieaza urmatoarele doua diagonale
-Fold the next two diagonals


12)- Intoarce foia si transforma linia in "munte" OM intr-o linie in "vale"
-Turn back the paper and transform the mountain line OM in a valley line.


13)- Plieaza in spate orizontala inferioara,apoi coltul stang dupa diagonala
-Fold back the horizontal line,than the left corner after the diagonal line.


14)-Plieaza in spate coltul superior stang
- Fold back the superior left corner

15)-Urmeaza atent etapele pentru alcatuirea coltului dreptunghiular cu relieful specific.Incepe cu a transforma linia NP ,intr-o linie in "vale"
-Follow with atention the next steps for to form the rectangle corner in 3D relief.Begin with the transforming of NP line in a "valley" line.


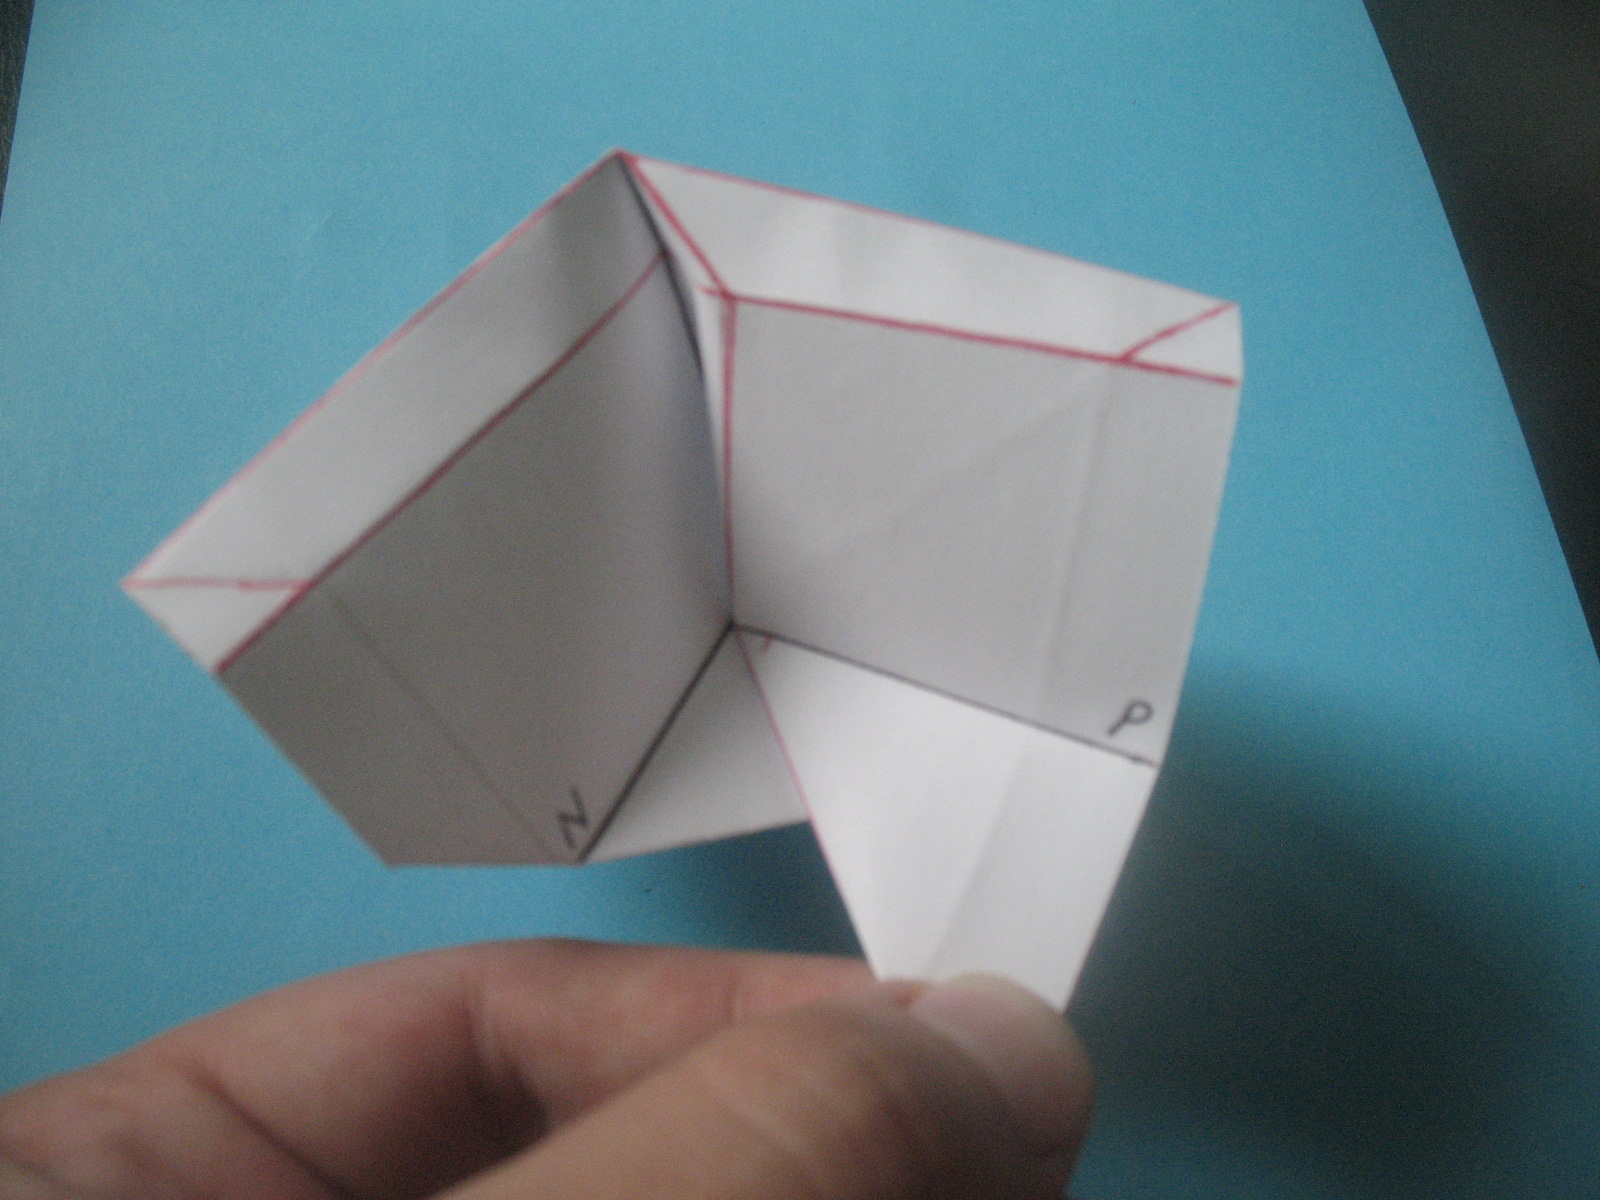

Mentiune:Impinge cu degetul pana in capatul coltului ,rezultatul in imaginea urmatoare
Mention: Push with the finger to the end of the corner,see the result in the next photo:

16)-Plieaza dupa liniile in munte partea laterala stanga a coltarului
-Fold after the mountain lines the left part of the rectangle corner

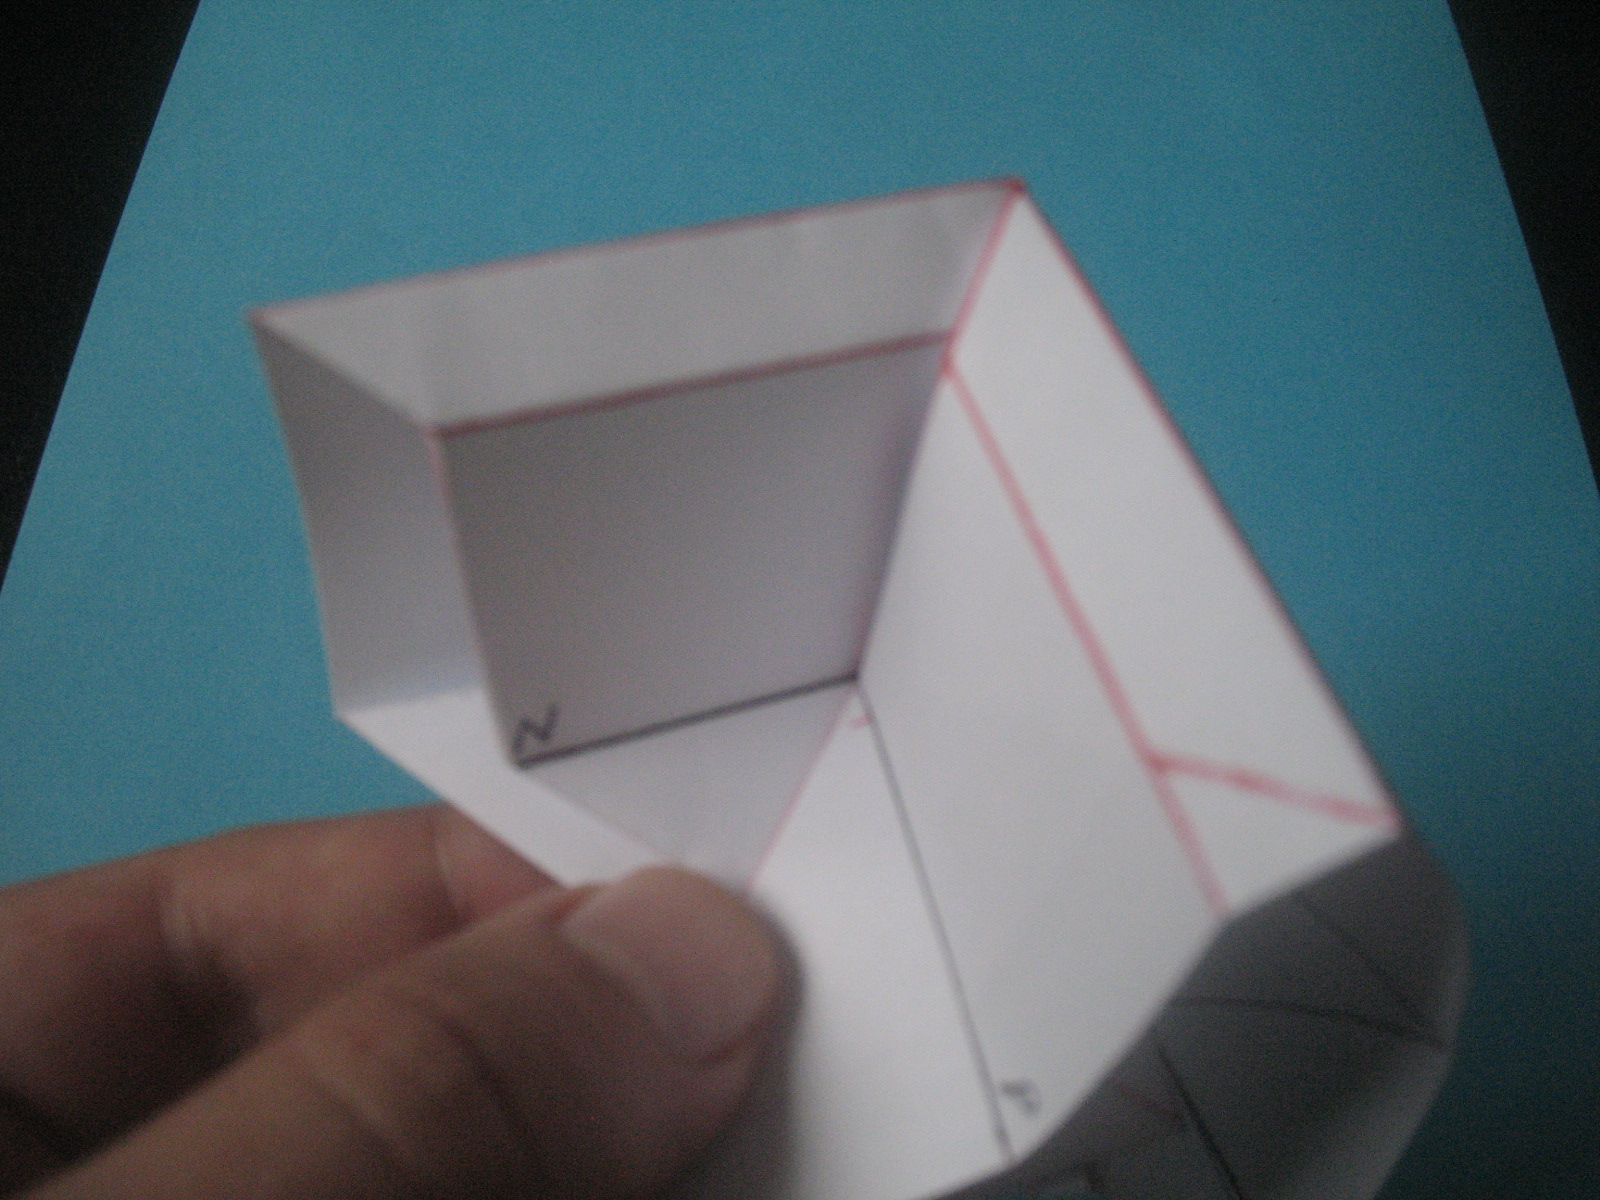
17)-Intoarce modelul si plieaza pentru a obtine spatele cutiei (etapa 4)
-Turn back the model and fold for to obtain the bottom of the box(step 4 too)


18)- Modul finit!!!
- Finit Unit!!!

B)-Conexiune module
-Joining the modules
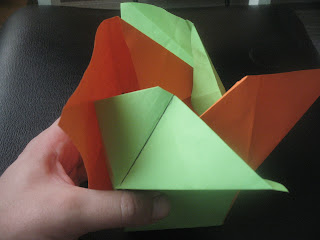
1)-confectioneaza 4 module,deschide modelul si uneste-le astfel
-make 4 modules,open the model and join them as in the photos:


 Mentiune: Foaia verde intra in partea de jos sub pliul de jos portocaliu,sus prinde cu o clema
Mention:The inferior part of green paper goes in orange fold,fix with a clem the superior parts of paper
 2)-Intoarce foaia si plieaza dupa linia superioara a mijlocului foii
-Turn back the papaer and fold after the superior line of the middle of the rectangle
 3)-Plieaza dupa liniile verticale,si in final intodu jumatatea stanga portocalie sub laterala verde din dreapta.
-Fold after vertical lines,and finally put the left half of orange paper under the green right lateral


 4)-Acum roteste hartia din interior dupa cele 4 diagonale interioare in munte(cea mai dificila parte)
-Now round inside the paper,folding all 4 diagonals in mountain(the most difficult part)


 5)- Impinge bine de patratul format pana cand in fata se contureaza relieful tridimensional al cutiei
-Push strong inside the square while in front you get the 3d reliefof the box

 6)-Acum inchide partea din spate a cutiei
-Now close the bottom of the box


 Mentiune:Linia neagra indica faptul ca toate aceste linii aflate in munte,se vor transforma in linii in vale
Mention:The black line show you that you have to transform all these lines in valley lines
 Mentiune:d1 se va suprapune peste d2,apoi d3 peste d4,etc
Mention:d1 over d2,than d3 over d4,etc


 Presati bine muchiile cutiei:spre interior in spate si spre exterior in fata
Press well the laterals of the box: to interior (bottom) ,to exterior in front

 FINISH!!!!!
 Pare dificil,dar de fapt nu este chiar asa,doar ceva exersare este necesara...abia dupa 3,4 modele poti ajunge la un rezultat clar,precis,bine executat.
Try mores for a clear and welldone model!

B)-Conexiune module
-Joining the modules
1)-confectioneaza 4 module,deschide modelul si uneste-le astfel
-make 4 modules,open the model and join them as in the photos:


Mention:The inferior part of green paper goes in orange fold,fix with a clem the superior parts of paper

-Turn back the papaer and fold after the superior line of the middle of the rectangle

-Fold after vertical lines,and finally put the left half of orange paper under the green right lateral


-Now round inside the paper,folding all 4 diagonals in mountain(the most difficult part)


-Push strong inside the square while in front you get the 3d reliefof the box


-Now close the bottom of the box


Mention:The black line show you that you have to transform all these lines in valley lines

Mention:d1 over d2,than d3 over d4,etc


Press well the laterals of the box: to interior (bottom) ,to exterior in front


Try mores for a clear and welldone model!
SUCCES!